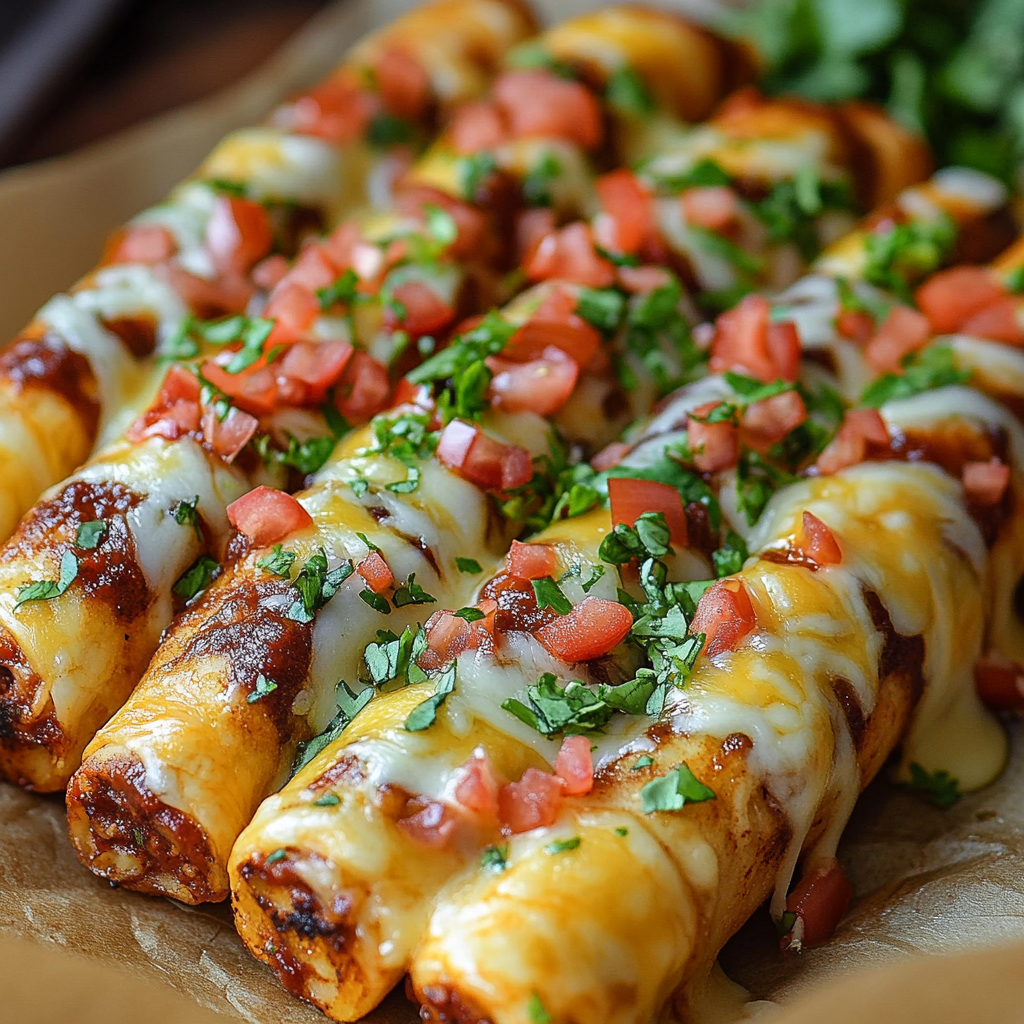
Looking for a fun, delicious, and easy-to-make appetizer or dinner? Cheesy Taco Sticks are the perfect combination of cheesy, savory, and slightly spicy flavors wrapped up in soft, golden dough. Whether you’re hosting a game night, preparing a family meal, or simply craving something satisfying, these cheesy taco sticks will hit the spot. With a taco-inspired filling and melted cheese inside a crispy dough crust, they offer a perfect bite every time.
The taco filling is simple yet packed with flavor, making it a great option for even picky eaters. Serve them with your favorite dipping sauces, such as sour cream, salsa, or guacamole, for an extra kick. These cheesy taco sticks are versatile enough to be enjoyed as a main course or as a crowd-pleasing snack!
Why You’ll Love This Recipe
1. Taco Flavors in a Fun Form
These cheesy taco sticks combine the familiar, comforting flavors of tacos into a handheld treat. The cheesy filling is like a taco, but wrapped in dough for a fun twist.
2. Quick and Easy
With minimal ingredients and steps, these cheesy taco sticks come together quickly, making them perfect for busy nights or spontaneous cravings.
3. Customizable
Feel free to make these taco sticks your own by adding extra ingredients like diced jalapeños, olives, or other veggies to the filling.
4. Kid-Friendly
The cheesy, mild taco filling inside soft dough is sure to be a hit with kids. These taco sticks are a great way to get kids involved in cooking too.
5. Great for Meal Prep or Parties
These cheesy taco sticks can be made ahead of time and stored in the fridge or freezer, making them a convenient option for meal prepping or serving at parties.
Ingredients
- Pizza dough (store-bought or homemade)
- Ground beef or chicken (cooked and crumbled)
- Taco seasoning
- Shredded cheddar cheese
- Shredded mozzarella cheese
- Salsa (optional)
- Sour cream (optional)
- Olive oil (for brushing)
Variations
- Add Some Spice: For extra heat, add diced jalapeños or a sprinkle of chili flakes to the taco filling.
- Vegetarian Version: Swap the meat for black beans, refried beans, or sautéed vegetables like bell peppers and onions.
- Different Cheeses: Use different cheeses such as Monterey Jack, pepper jack, or a Mexican cheese blend for added flavor.
- Make It a Supreme: Add shredded lettuce, diced tomatoes, or sour cream inside the sticks for a “supreme” version of the taco stick.
- Taco Shell Dough: For an even more authentic taco flavor, add taco seasoning to the dough itself.
How to Make the Recipe
Step 1: Preheat the Oven
Preheat your oven to 375°F (190°C) and line a baking sheet with parchment paper or lightly grease it with cooking spray.
Step 2: Prepare the Taco Filling
In a skillet, cook the ground beef or chicken over medium heat until fully cooked. Drain any excess fat, then add taco seasoning and a splash of water (about 1/4 cup). Stir until well combined and the seasoning is absorbed. Remove from heat and set aside to cool slightly.
Step 3: Roll Out the Dough
Roll out the pizza dough on a floured surface into a large rectangle. Use a sharp knife or pizza cutter to divide the dough into smaller rectangular strips (about 6-8 pieces depending on the size you want).
Step 4: Assemble the Taco Sticks
Spoon a portion of the taco filling onto the center of each dough strip. Sprinkle a generous amount of shredded cheddar and mozzarella cheese on top of the taco filling. Fold the dough over the filling to create a pocket, pinching the sides to seal them shut.
Step 5: Brush with Olive Oil
Place the filled taco sticks on the prepared baking sheet. Brush the tops of the taco sticks with olive oil to help them turn golden and crispy as they bake.
Step 6: Bake
Bake the taco sticks in the preheated oven for 15-20 minutes or until the dough is golden brown and the cheese inside has melted.
Step 7: Serve
Once the taco sticks are done, remove them from the oven and let them cool for a few minutes. Serve warm with dipping sauces like sour cream, salsa, or guacamole.
Tips for Making the Recipe
- Don’t Overstuff: Be careful not to overstuff the taco sticks, as it may make them difficult to seal or cause the filling to spill out during baking.
- Use Leftover Meat: This recipe is a great way to use up leftover taco meat from a previous meal.
- Crimp the Edges Well: Make sure to crimp the edges of the dough tightly so the filling doesn’t leak out while baking.
- Add Fresh Toppings: If you like, top the baked taco sticks with fresh diced tomatoes, lettuce, or a drizzle of sour cream for added freshness.
How to Serve
Serve these cheesy taco sticks with your favorite taco toppings or dipping sauces such as salsa, guacamole, sour cream, or even a bit of hot sauce. They make a perfect appetizer or main dish, and can be enjoyed alongside a simple salad, chips, or even some Mexican rice.
Make Ahead and Storage
Storing Leftovers
Store any leftover taco sticks in an airtight container in the refrigerator for up to 3 days. Reheat them in the oven at 350°F (175°C) for about 5-7 minutes until warm.
Freezing
To freeze, let the taco sticks cool completely, then wrap them individually in plastic wrap and place them in a freezer-safe bag or container. They’ll stay fresh for up to 2 months. Reheat from frozen by baking at 350°F (175°C) for 15-20 minutes.
Reheating
Reheat taco sticks in the oven for the best texture, or use the microwave for a quicker option, though the crust may not be as crispy.
FAQs
1. Can I use a different kind of dough?
Yes, you can use puff pastry, crescent roll dough, or even tortillas if you want a different texture.
2. Can I make these vegetarian?
Absolutely! Substitute the meat with black beans, refried beans, or sautéed vegetables for a vegetarian-friendly version.
3. Can I use store-bought taco seasoning?
Yes, using store-bought taco seasoning is a quick and easy way to get the flavor you need for these taco sticks.
4. How do I prevent the taco sticks from opening while baking?
Make sure to pinch the edges of the dough tightly and brush the tops with olive oil to help seal them.
5. Can I make these taco sticks in advance?
Yes, you can prepare the taco sticks ahead of time and store them in the fridge until you’re ready to bake them.
6. Can I add extra cheese to the filling?
Yes, feel free to add extra cheese to the taco filling for a cheesier experience.
7. Can I make these gluten-free?
Yes, you can use gluten-free pizza dough to make this recipe gluten-free.
8. Can I freeze the taco sticks?
Yes, you can freeze the taco sticks for up to 2 months. Just reheat them in the oven before serving.
9. Can I make the taco sticks spicy?
Yes, add chopped jalapeños or a spicy salsa to the filling to add heat.
10. How can I make these taco sticks crispy?
Brushing the taco sticks with olive oil and baking them at a high temperature will help them become crispy on the outside.

Conclusion
Cheesy Taco Sticks are a fun, flavorful, and easy-to-make dish that will be loved by everyone. Whether served as a snack, appetizer, or main course, these taco-inspired sticks bring together the best of both worlds—cheesy, savory, and perfectly crispy. Customize them to suit your tastes, and enjoy them with your favorite dipping sauces for a deliciously satisfying treat!
Print
Cheesy Taco Sticks
- Total Time: 35 minutes
- Yield: 12 taco sticks 1x
Description
Cheesy Taco Sticks are a fun and delicious twist on traditional tacos! These cheesy, crispy sticks are filled with seasoned ground beef, melted cheese, and taco flavors, making them the perfect appetizer or snack for taco lovers. Serve them with your favorite dipping sauce for the ultimate treat!
Ingredients
-
1 lb ground beef (or ground turkey for a lighter option)
-
1 packet taco seasoning mix
-
¼ cup water
-
1 package refrigerated pizza dough (or use homemade dough)
-
1 cup shredded cheddar cheese (or Mexican cheese blend)
-
1 tablespoon olive oil (for brushing)
-
Salsa or sour cream (for dipping, optional)
Instructions
-
Preheat oven to 375°F (190°C). Line a baking sheet with parchment paper.
-
Cook the beef: In a large skillet, cook the ground beef over medium heat until browned, breaking it up with a spoon. Drain excess fat, then add taco seasoning and water. Stir well to combine, and simmer for 2-3 minutes, until the mixture thickens. Remove from heat and set aside.
-
Prepare the dough: Roll out the pizza dough on a lightly floured surface into a large rectangle (about 10×12 inches).
-
Assemble the taco sticks: Spread the cooked beef mixture evenly over the dough, leaving about a 1-inch border. Sprinkle shredded cheddar cheese evenly on top of the beef.
-
Roll the dough: Starting from one edge, carefully roll the dough up into a log, pinching the ends to seal. Slice the rolled dough into 1-inch wide pieces.
-
Bake the taco sticks: Place the taco sticks on the prepared baking sheet. Brush the tops with olive oil to help them get golden and crispy. Bake for 15-20 minutes, or until the dough is golden and the cheese is melted.
-
Serve: Allow the taco sticks to cool for a couple of minutes before serving. Serve with salsa or sour cream for dipping.
Notes
For a spicier version, add diced jalapeños or a sprinkle of crushed red pepper to the beef mixture
You can also make these ahead of time and freeze them before baking. Just bake them from frozen at 375°F for 20-25 minutes.
- Prep Time: 15 minutes
- Cook Time: 20 minutes
- Category: Appetizer / Snack
- Method: Baking
- Cuisine: Mexican-American


