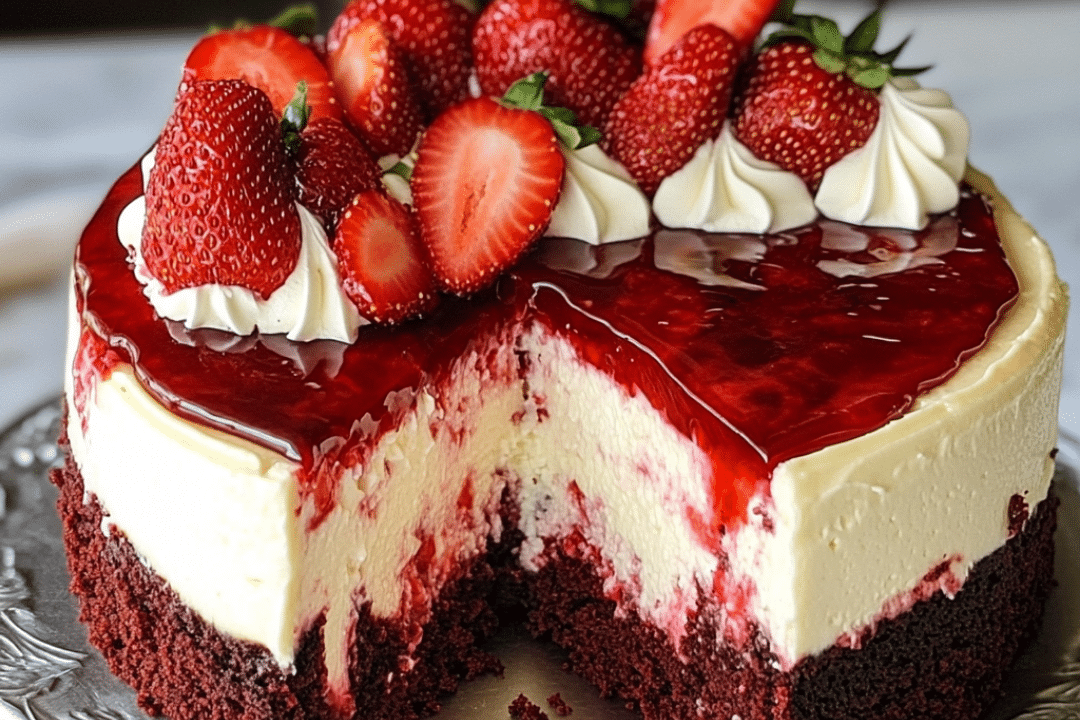
Red Velvet Cake is the epitome of indulgence. Known for its striking crimson color and its unique, rich flavor, this cake has been a favorite for birthdays, holidays, and special celebrations for years. With its velvety smooth texture and tangy flavor from the buttermilk, it’s no surprise that Red Velvet Cake has stood the test of time. Paired with cream cheese frosting, this cake is a delightful balance of sweetness, tanginess, and richness. Whether you’re making it for a special occasion or simply because you crave a decadent dessert, Red Velvet Cake never disappoints.
This cake’s signature color comes from the addition of red food coloring, giving it a vibrant and eye-catching appearance. But it’s not just about looks—the combination of cocoa powder, buttermilk, and vinegar creates a moist cake with a slightly tangy flavor that sets it apart from other cakes. Paired with the smooth cream cheese frosting, this dessert is truly irresistible. Whether you’re a fan of traditional cakes or enjoy experimenting with unique flavors, Red Velvet Cake is a must-try that will leave everyone asking for seconds.
Why You’ll Love This Recipe
1. Beautiful and Eye-Catching
The bright red color of the cake makes it the perfect centerpiece for any celebration or gathering.
2. Unique Flavor
The cake has a slightly tangy, rich flavor thanks to the combination of buttermilk, cocoa powder, and vinegar, which sets it apart from other chocolate cakes.
3. Moist and Tender
The oil in the batter creates a moist, soft texture that’s perfect for a light and fluffy cake.
4. Cream Cheese Frosting Perfection
The tangy cream cheese frosting complements the cake’s flavor beautifully, adding a rich and creamy topping that’s simply irresistible.
5. Easy to Make
This Red Velvet Cake is surprisingly easy to make, with a simple list of ingredients and straightforward instructions that will make you a cake expert in no time.
Ingredients
- 2 1/2 cups all-purpose flour
- 1 1/2 cups granulated sugar
- 1 teaspoon baking soda
- 1 teaspoon salt
- 1 teaspoon cocoa powder
- 1 1/2 cups vegetable oil
- 1 cup buttermilk, room temperature
- 2 large eggs, room temperature
- 2 tablespoons red food coloring
- 1 teaspoon vanilla extract
- 1 teaspoon white vinegar
Variations
Add Chocolate Chips
For extra chocolatey goodness, fold in a cup of mini chocolate chips into the batter.
Make it Gluten-Free
You can use a gluten-free all-purpose flour blend in place of regular flour to make the cake gluten-free.
Change the Frosting
While cream cheese frosting is traditional, you can also use buttercream frosting or whipped cream for a lighter topping.
Add a Little Extra Flavor
Experiment by adding a teaspoon of almond extract or lemon zest to the batter for a unique twist on the classic flavor.
How to Make the Recipe
Step 1: Preheat the Oven
Preheat your oven to 350°F (175°C). Grease and flour two 9-inch round cake pans and set aside.
Step 2: Mix the Dry Ingredients
In a medium bowl, sift together the all-purpose flour, granulated sugar, baking soda, salt, and cocoa powder. Set aside.
Step 3: Combine Wet Ingredients
In a large bowl, whisk together the vegetable oil, buttermilk, eggs, red food coloring, vanilla extract, and white vinegar until smooth and well combined.
Step 4: Add Dry Ingredients to Wet Ingredients
Gradually add the dry ingredients to the wet ingredients, mixing until fully incorporated and the batter is smooth.
Step 5: Bake the Cake
Divide the batter evenly between the prepared cake pans. Bake for 25-30 minutes, or until a toothpick inserted into the center of the cakes comes out clean.
Step 6: Cool the Cakes
Allow the cakes to cool in the pans for 10 minutes, then remove them from the pans and transfer them to a wire rack to cool completely.
Step 7: Frost the Cake
Once the cakes have cooled completely, spread a layer of cream cheese frosting on top of one cake layer. Place the second cake layer on top and frost the top and sides of the cake.
Tips for Making the Recipe
- Room Temperature Ingredients: Make sure your eggs and buttermilk are at room temperature for the best texture in the batter.
- Don’t Overmix: When combining the dry and wet ingredients, mix just until combined. Overmixing can lead to a dense cake.
- Check for Doneness: Check the cake with a toothpick or cake tester to ensure it’s fully baked; the toothpick should come out clean when inserted into the center.
- Use Gel Food Coloring: Gel food coloring works best for vibrant colors and doesn’t alter the consistency of the batter like liquid food coloring may.
How to Serve
Red Velvet Cake is best served after it has chilled in the refrigerator for about an hour, as this allows the cream cheese frosting to firm up. Slice the cake into generous pieces and serve it with a cold glass of milk or a cup of coffee for the perfect treat. This cake is ideal for birthdays, holidays, or any special occasion where you want to make an impression.
Make Ahead and Storage
Storing Leftovers
Store any leftover Red Velvet Cake in an airtight container in the refrigerator for up to 5 days. The cake can be enjoyed chilled or at room temperature.
Freezing
If you’d like to make the cake in advance, you can freeze the unassembled layers. Wrap each cake layer tightly in plastic wrap and aluminum foil before freezing for up to 3 months. To defrost, let the layers sit at room temperature for a few hours before frosting.
Reheating
If you prefer your cake warm, you can microwave individual slices for a few seconds. Just be sure not to overheat the frosting!
FAQs
1. Can I use regular food coloring instead of gel?
Gel food coloring works best for the vibrant red color, but regular liquid food coloring can be used in a pinch.
2. Can I make this cake without buttermilk?
Yes, you can substitute buttermilk with 1 cup of milk mixed with 1 tablespoon of white vinegar or lemon juice. Let it sit for a few minutes to curdle before using.
3. Can I make this cake into cupcakes?
Yes, you can use the same batter to make cupcakes. Bake for 18-20 minutes, or until a toothpick comes out clean.
4. How can I make this cake gluten-free?
Simply substitute the all-purpose flour with a 1-to-1 gluten-free flour blend.
5. Can I freeze the cake layers?
Yes, you can freeze the cake layers. Wrap them tightly in plastic wrap and foil before freezing for up to 3 months.
6. How can I make this cake less sweet?
If you find the cake too sweet, reduce the sugar by 1/4 cup. The tangy cream cheese frosting will balance out the flavor.
7. Can I use a different frosting?
While cream cheese frosting is traditional, buttercream or whipped cream can be used as an alternative if you prefer a lighter frosting.
8. How can I make the cake more moist?
Ensure you’re using the correct amount of oil, and avoid overmixing the batter. The oil is essential for the cake’s moist texture.
9. Can I add extra flavor to the cake?
You can add a teaspoon of almond extract or lemon zest to the batter for a unique twist.
10. What should I serve with Red Velvet Cake?
Red Velvet Cake pairs wonderfully with a glass of milk, coffee, or even a scoop of vanilla ice cream for a delightful dessert experience.
Conclusion
Red Velvet Cake is a classic dessert that never goes out of style. With its striking red color, moist texture, and creamy frosting, this cake is perfect for any occasion. Whether you’re celebrating a birthday or just want to indulge in a delicious treat, Red Velvet Cake is sure to impress your guests and satisfy your sweet tooth.
Print
Red Velvet Cake
- Total Time: 50 minutes
- Yield: 12 servings 1x
Description
BThis classic red velvet cake is a perfect balance of richness, moisture, and subtle cocoa flavor, paired with a beautiful red color. Topped with creamy cream cheese frosting, it’s a favorite for birthdays, holidays, and other special occasions.
Ingredients
- 2 1/2 cups all-purpose flour
- 1 1/2 cups granulated sugar
- 1 teaspoon baking soda
- 1 teaspoon salt
- 1 teaspoon cocoa powder
- 1 1/2 cups vegetable oil
- 1 cup buttermilk, room temperature
- 2 large eggs, room temperature
- 2 tablespoons red food coloring
- 1 teaspoon white vinegar
- 1 teaspoon vanilla extract
Instructions
- Preheat your oven to 350°F (175°C). Grease and flour two 9-inch round cake pans.
- In a large bowl, whisk together the flour, sugar, baking soda, salt, and cocoa powder.
- In another bowl, whisk together the vegetable oil, buttermilk, eggs, red food coloring, vinegar, and vanilla extract until well combined.
- Gradually add the wet ingredients to the dry ingredients, mixing until smooth and fully combined.
- Divide the batter evenly between the prepared cake pans.
- Bake for 25-30 minutes, or until a toothpick inserted into the center comes out clean.
- Allow the cakes to cool in the pans for 10 minutes, then remove them from the pans and let them cool completely on a wire rack.
- Once the cakes are completely cool, frost with cream cheese frosting and serve.
Notes
- You can adjust the amount of food coloring to your preference for a deeper or lighter red color.
- Be sure to use room temperature ingredients for better mixing and smoother batter.
- If you prefer a fluffier cake, you can separate the eggs and beat the whites before folding them into the batter.
- Prep Time: 20 minutes
- Cook Time: 30 minutes

