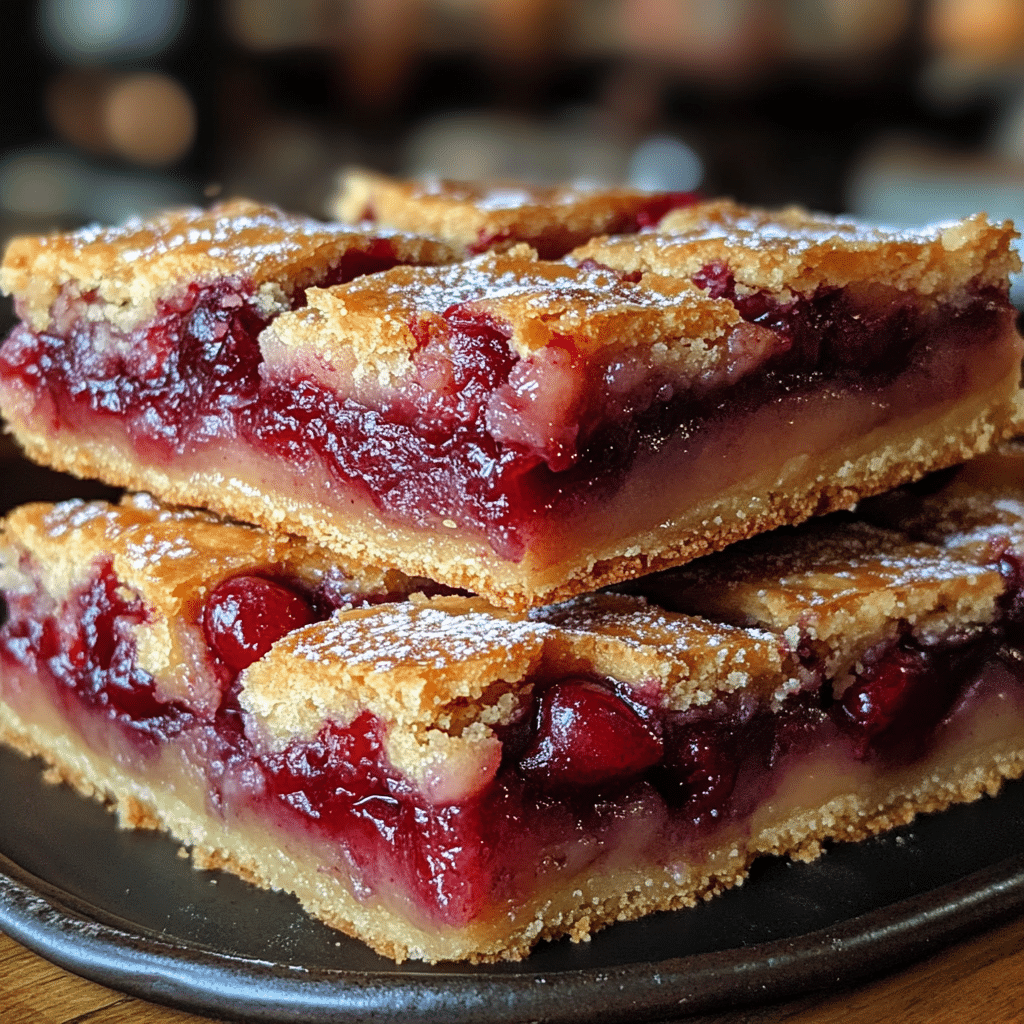
Cherry Pie Bars are a delicious, portable twist on the classic cherry pie, offering all the flavors of a traditional pie but in an easy-to-make bar form. These bars feature a buttery, crumbly crust that’s topped with a sweet and tangy cherry filling, creating the perfect balance of flavors and textures. With a hint of almond extract and a golden, slightly crispy topping, these bars are the perfect dessert to serve at any occasion, from casual family gatherings to special events. Whether you’re craving a slice of pie or simply want to enjoy cherries in a new way, Cherry Pie Bars are sure to be a hit!
Why You’ll Love This Recipe
1. Easy to Make
Unlike traditional pies that require careful crust work and lots of time, these bars come together quickly and easily, making them perfect for busy bakers.
2. Portable and Convenient
With their bar format, these are easy to slice, serve, and take on the go—no need for pie plates or worrying about messy slices.
3. Perfect Balance of Sweet and Tart
The cherry filling brings a natural tartness, while the sweet, buttery crust and crumble topping create a perfect harmony of flavors.
4. Versatile
This recipe can be adapted with different fruits or toppings. You could swap cherries for blueberries, peaches, or even mixed berries for a fun twist.
5. Crowd-Pleaser
The combination of a soft, buttery crust, a thick, sweet fruit filling, and a crisp crumble topping makes these bars irresistible to anyone with a sweet tooth.

Ingredients
For the Crust and Topping
- All-purpose flour
- Granulated sugar
- Baking powder
- Salt
- Butter
- Eggs
- Almond extract
For the Cherry Filling
- Fresh or frozen cherries
- Granulated sugar
- Cornstarch
- Lemon juice
- Almond extract (optional)
Optional Toppings
- Powdered sugar (for dusting)
- Whipped cream or vanilla ice cream (for serving)
Variations
- Berry Pie Bars: Swap cherries for blueberries, strawberries, or raspberries for a different fruit flavor.
- Peach Pie Bars: Use fresh or canned peaches for a summer twist on these pie bars.
- Lemon Cherry Bars: Add a little lemon zest to the cherry filling to brighten up the flavors.
- Crumble Only Topping: If you prefer more crumble, double the amount of topping for extra crunch.
- Vegan Version: Substitute the butter with vegan butter and use a flax egg for a vegan-friendly version of these bars.
How to Make the Recipe
Step 1: Preheat the Oven
Preheat your oven to 350°F (175°C). Grease a 9×13-inch baking pan or line it with parchment paper for easy removal of the bars.
Step 2: Prepare the Crust
In a large mixing bowl, combine the flour, sugar, baking powder, and salt. Add the butter and mix until the mixture resembles coarse crumbs. Add the egg and almond extract, then mix until combined.
Press about two-thirds of the dough into the bottom of the prepared pan to form the crust. Set aside the remaining dough for the topping.
Step 3: Make the Cherry Filling
In a medium saucepan, combine the cherries, sugar, cornstarch, and lemon juice. Cook over medium heat, stirring frequently, until the mixture thickens and the cherries release their juice. Once thickened, remove from heat and stir in the almond extract. Allow the filling to cool slightly.
Step 4: Assemble the Bars
Spread the cherry filling evenly over the crust. Crumble the remaining dough over the top to form a crumbly topping.
Step 5: Bake the Bars
Bake for 35-40 minutes, or until the crust is golden brown and the topping is slightly crispy. Let the bars cool in the pan for about 30 minutes, then transfer to the refrigerator to chill for another hour.
Step 6: Serve and Enjoy
Once chilled, cut into squares and serve. Optionally, dust with powdered sugar or serve with a scoop of whipped cream or vanilla ice cream.

Tips for Making the Recipe
- Use Fresh or Frozen Cherries: Both fresh and frozen cherries work well for the filling. If using frozen cherries, thaw them first and drain off any excess liquid.
- Customize the Crust: You can experiment with adding a little cinnamon or nutmeg to the crust for added flavor.
- Chill Before Cutting: Allow the bars to cool completely and chill in the fridge before cutting for cleaner slices.
- Don’t Skip the Almond Extract: The almond extract enhances the cherry flavor and adds a nice depth to the filling.
How to Serve
Serve your Cherry Pie Bars at room temperature or slightly chilled. They’re perfect on their own, but for extra indulgence, you can top them with a dusting of powdered sugar, a dollop of whipped cream, or a scoop of vanilla ice cream. These bars also pair wonderfully with a hot cup of tea or coffee.
Make Ahead and Storage
Storing Leftovers
Store the bars in an airtight container at room temperature for up to 3 days, or refrigerate them for up to 5 days for longer freshness.
Freezing
To freeze, slice the bars and place them in a single layer on a baking sheet. Freeze until solid, then transfer to a freezer-safe container or bag. Frozen bars can be stored for up to 2 months. Thaw at room temperature before serving.
Reheating
If you prefer warm bars, simply reheat them in the microwave for a few seconds or in the oven at 350°F (175°C) for about 5-7 minutes.
FAQs
1. Can I use other fruits instead of cherries?
Yes, you can use blueberries, raspberries, strawberries, or a mix of your favorite berries.
2. How do I make the crust crispier?
For a crispier crust, bake it for 10 minutes before adding the cherry filling.
3. Can I make these bars ahead of time?
Yes, you can make the bars a day in advance. Just store them in the refrigerator and let them come to room temperature before serving.
4. Can I use a store-bought crust?
Yes, if you’re short on time, you can use a pre-made pie crust or shortbread cookies for the crust.
5. How can I make the filling thicker?
To thicken the filling more, add a little extra cornstarch, but be careful not to add too much as it can affect the texture.
6. Can I add a crumble topping instead of the full crust?
Yes, you can make these as a crumble bar by using just the crumbly dough as both the crust and topping.
7. Can I use a gluten-free flour for the crust?
Yes, you can use a gluten-free all-purpose flour blend to make these bars gluten-free.
8. What other flavoring can I use in the filling?
In addition to almond extract, you can use vanilla extract or a dash of cinnamon for added flavor.
9. Can I freeze Cherry Pie Bars?
Yes, they freeze well. Just be sure to let them cool completely before freezing, and store them in an airtight container.
10. How do I cut the bars neatly?
Chill the bars before cutting to ensure clean, even slices.

Conclusion
Cherry Pie Bars are a wonderfully simple yet decadent dessert that’s perfect for any occasion. With a buttery crust, tangy cherry filling, and a crunchy crumble topping, these bars offer all the flavors of a classic cherry pie in an easy-to-serve format. Whether you’re hosting a gathering, preparing a family treat, or simply enjoying something sweet, these Cherry Pie Bars will satisfy your cravings and leave everyone asking for the recipe.
Print
Cherry Pie Bars Recipe
- Total Time: 1 hour
- Yield: 12–16 bars 1x
- Diet: Vegetarian
Description
These Cherry Pie Bars are a perfect blend of buttery, flaky crust and sweet, tangy cherry filling, all in bar form! With a crumbly top and a rich cherry center, these bars are a simple yet irresistible dessert. They’re great for serving a crowd or enjoying at home with a cup of coffee or tea.
Ingredients
For the Crust and Topping:
- 2 1/2 cups all-purpose flour
- 1 cup granulated sugar
- 1/2 teaspoon baking powder
- 1/2 teaspoon salt
- 1 cup unsalted butter, cold and cut into small cubes
- 1 egg (for the crust dough)
For the Cherry Filling:
- 1 can (21 oz) cherry pie filling (or homemade cherry filling)
- 1 tablespoon cornstarch (if using fresh cherries)
- 1 tablespoon lemon juice (if using fresh cherries)
Instructions
- Preheat the oven: Preheat your oven to 350°F (175°C). Grease a 9×13-inch baking dish or line it with parchment paper for easy removal.
- Make the crust dough: In a medium bowl, combine the flour, sugar, baking powder, and salt. Add the cold cubed butter and use a pastry cutter or your fingers to blend until the mixture becomes crumbly and the butter is well incorporated. Add the egg and mix until a dough forms.
- Press the dough into the pan: Take about 2/3 of the dough and press it into the bottom of the prepared baking dish, forming an even layer.
- Prepare the cherry filling: If using fresh cherries, mix the cherries with cornstarch and lemon juice in a separate bowl. If using canned cherry pie filling, you can skip this step. Pour the cherry filling over the crust in the baking dish, spreading it out evenly.
- Top the bars: Crumble the remaining dough over the cherry filling to form a crumbly topping.
- Bake: Bake for 40-45 minutes, or until the crust is golden brown and the filling is bubbly. If the top starts to brown too quickly, cover the pan loosely with foil and continue baking.
- Cool and serve: Let the bars cool completely in the pan before cutting them into squares. For extra flavor, you can dust the cooled bars with powdered sugar before serving.
Notes
- You can substitute the cherry pie filling with other fruit pie fillings like blueberry or strawberry for a different variation.
- If using fresh cherries, you can cook them down with sugar to make your own filling.
- These bars are best enjoyed within 2-3 days, but they can be stored in an airtight container for up to a week.
- Prep Time: 15 minutes
- Cook Time: 40-45 minutes
- Category: Dessert
- Method: Baked
- Cuisine: American